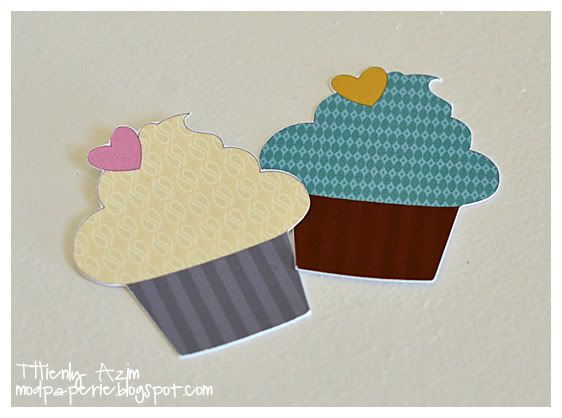
So, this is nothing spectacular, but here's what I made!
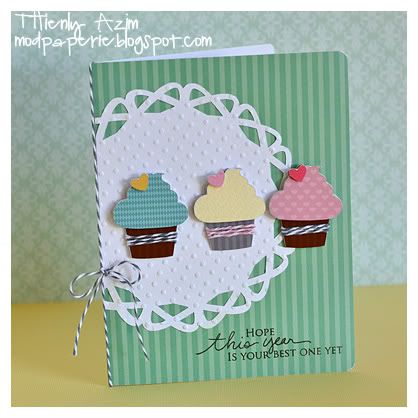
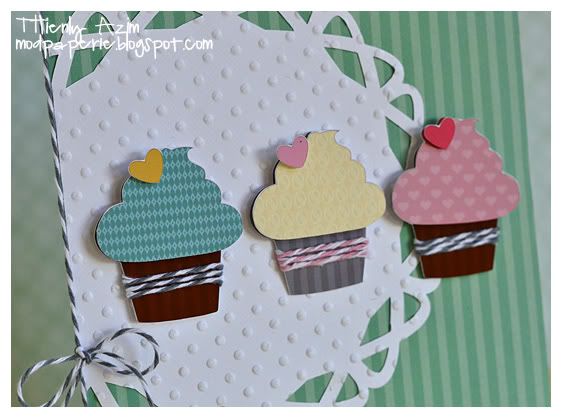
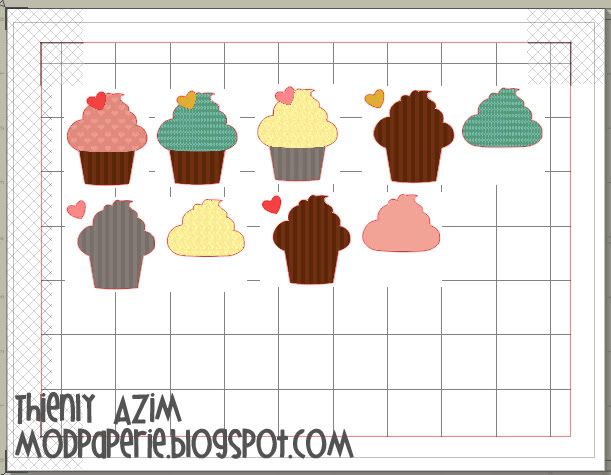
The cupcake is from LD Cloud Nine SVG, and I changed the cupcake icing and the wrappers to make three different ones
All the tiles I used here are from Matryoshka Cut It Tiles. Here, I made each of the portions separate (like how I would cut in a regular SVG - I personally like it separate as you can work around with dimension) but you could also put them together and save one one file to create a graphic.
I thought that I would show you step by step of how I did this, and hope that this would clarify somethings for you!
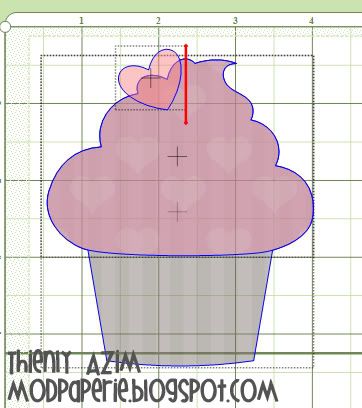
So, open up an SVG file that you would like to work with. Break apart the file.
You select one and right-click. It would bring up a menu, and click on "change texture".
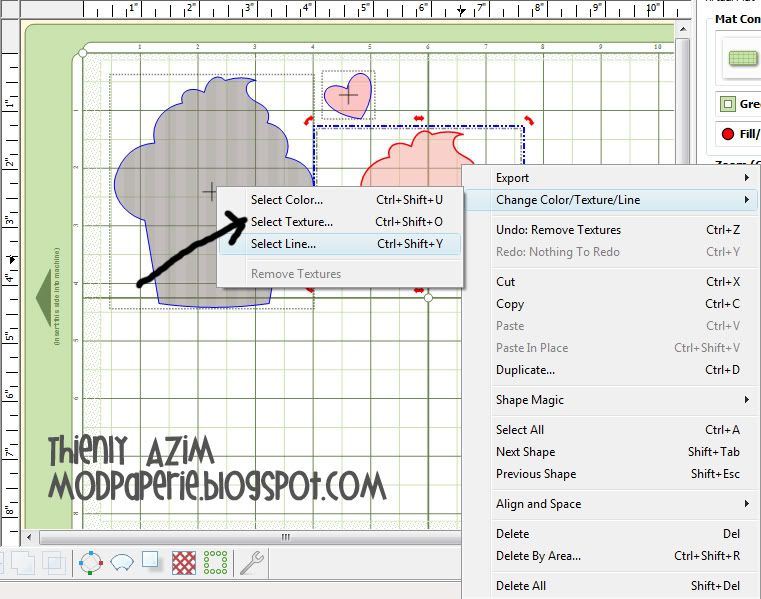
Then, you click on "choose texture from file" and find a tile that you would like to work with.
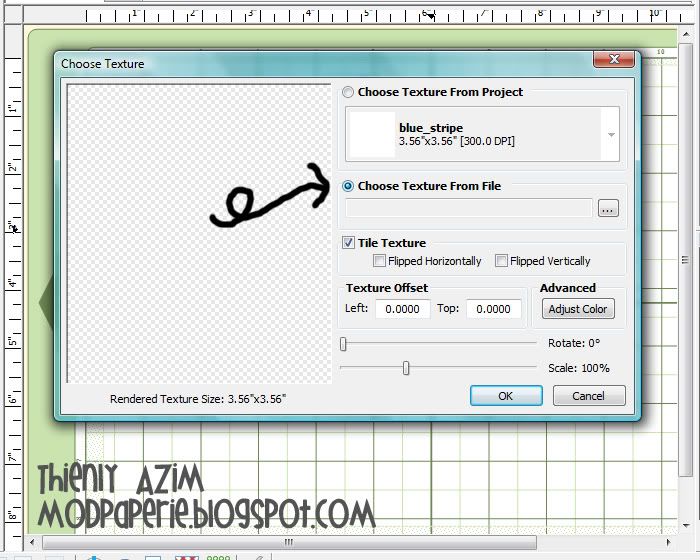
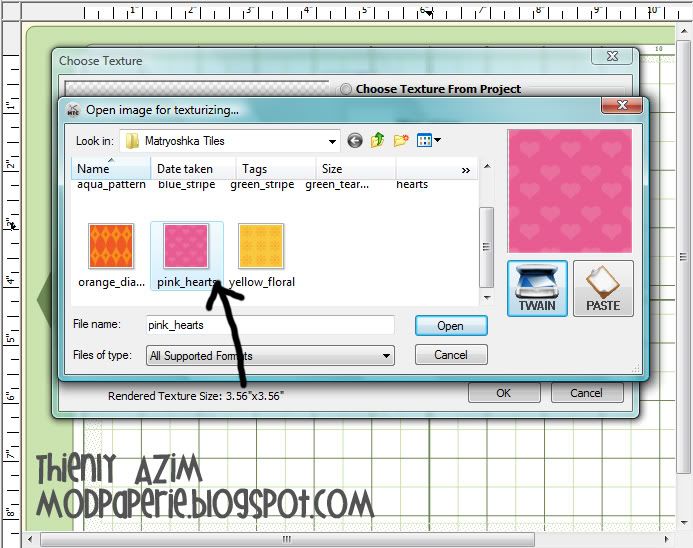
Now, you have the option to play with this tile. You can change the size of the pattern, spacing, rotate, adjust color... you play around with it! It's so fun - it's amazing what all you can do!
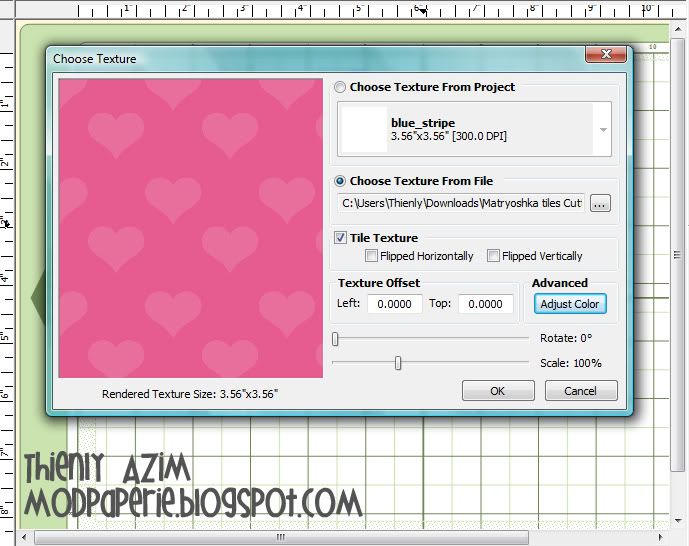
Once you like what you've got, click "ok"
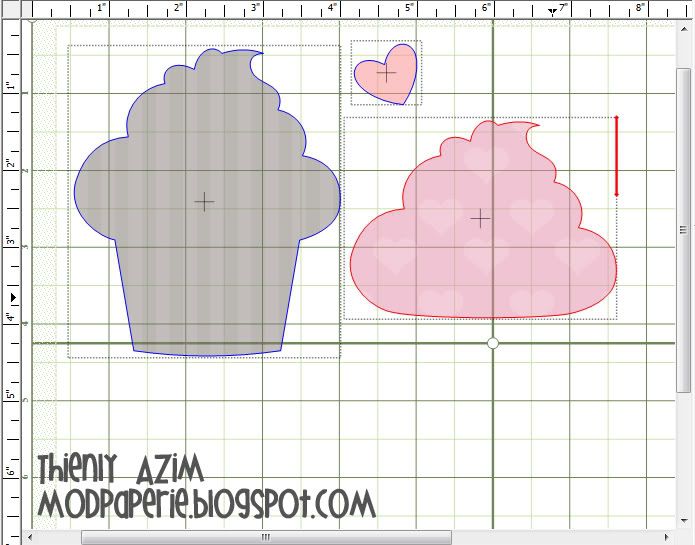
Now, it`s time to save the file so you can print and cut with it!
Click on Export and save the image the way you want it.
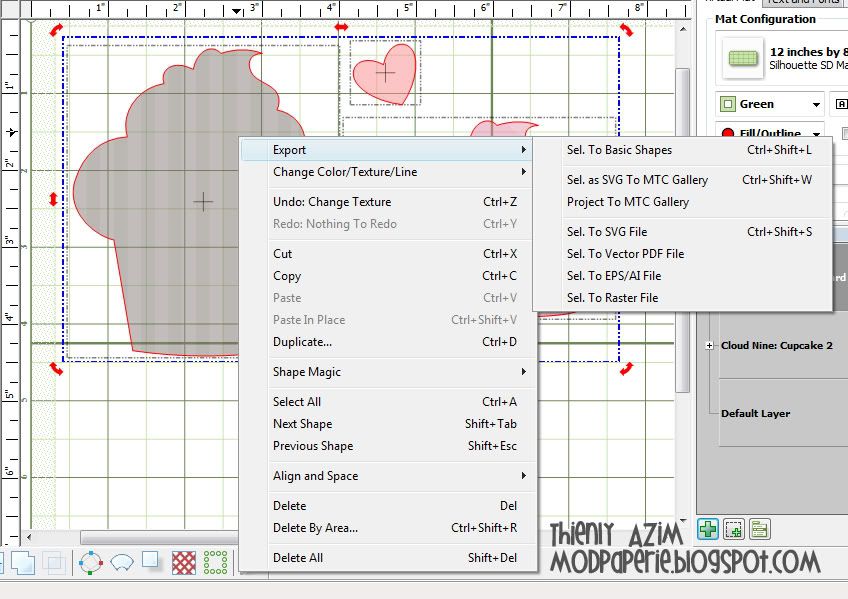
Here, I saved the portions separately, but you could bring the layers together and save as one file, too!
I brought up what I made on Silhouette Studio (I`m just used to doing Print and Cut here, but you can do on MTC as well!) and saved 3 cupcakes in layer formats, and as one image.
Lettering Delights is having a little contest over on Facebook for a random draw for $15 LD gift certificate. One winner will be chosen from all that posts their projects on their wall - so I`m posting this one :) Hope that you all give it a try! It`s really fun!
Have a great day everyone!

Very Nice - as always!
ReplyDeleteI still haven't gotten brave enough to try print and cut. I have a Black Cat and I understand I have to use the KNK plug-in to do print and cut. Maybe I'll get brave one of these days.
This is so cute!! I love your little tutorial, too! Awesome! :) I've got to try these!
ReplyDeleteDarn it now I want mtc AND silhouette! And probably a new printer. I need a job
ReplyDeleteThis is incredible and your making me crazy waiting for my new machine!
ReplyDeleteThank you for showing exactly how this was done. What did you use for the mat behind it?
ReplyDelete(And I am sorry that I won't be here much; I can barely read your blog - the pink and the grey are so similar in tone that it makes it difficult to read. I did use Crtl+ to make it bigger but it is more a tonal thing. I do have vision problems so maybe it is just me.)
This is pretty cool, and thank you for your tutorial, very helpful. I just did my first print and cut and it turned out ok...just cut a little outside the lines, but yours cut out great...maybe practice would help me.
ReplyDelete