Monday, August 29, 2011

I'm in LOVE with print and cut!

I am just sooo glad that Silhouette came when it did. I can't imagine not having this little baby right now. I seriously love this new arrival soo much!!! It has made my card making much more fun and easier.

With having the Silhouette, it's not just the die-cutting that I'm enjoying - it's actually the print and cut feature that I'm in love with.  It's so amazing how simple it is to use and how precise it cuts. However, this feeds more of my shopping addiction - now I can't stop buying files online!  I seriously have a binder full of graphics that I have purchased in the last several months... and this is a 2" binder I'm talking about...  (I try to tell my hubby that many of these are free... but he stares at me and the printer when it's printing all night long!) 

So... the card that I'll be sharing today is from Jessica Sprague graphics - the Cosmo Cricket Togetherness Candy Candy line. 


Isnt' this adorable??? It even has matching paper packs and other embellishment packs to match this! Cuteness!

I hate wasting paper... so I organized my thoughts in my head and on screen and print and cut-ted (???) enough graphics for making two cards. I just hate wasting my photo paper!

Here's what my screen looked like:
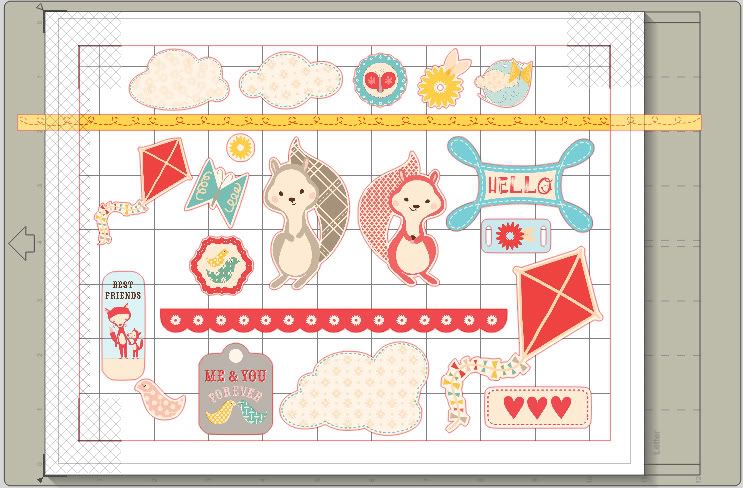
Photobucket

So, I used most of these graphics, along with the coordinating paper packs, and made two cards!
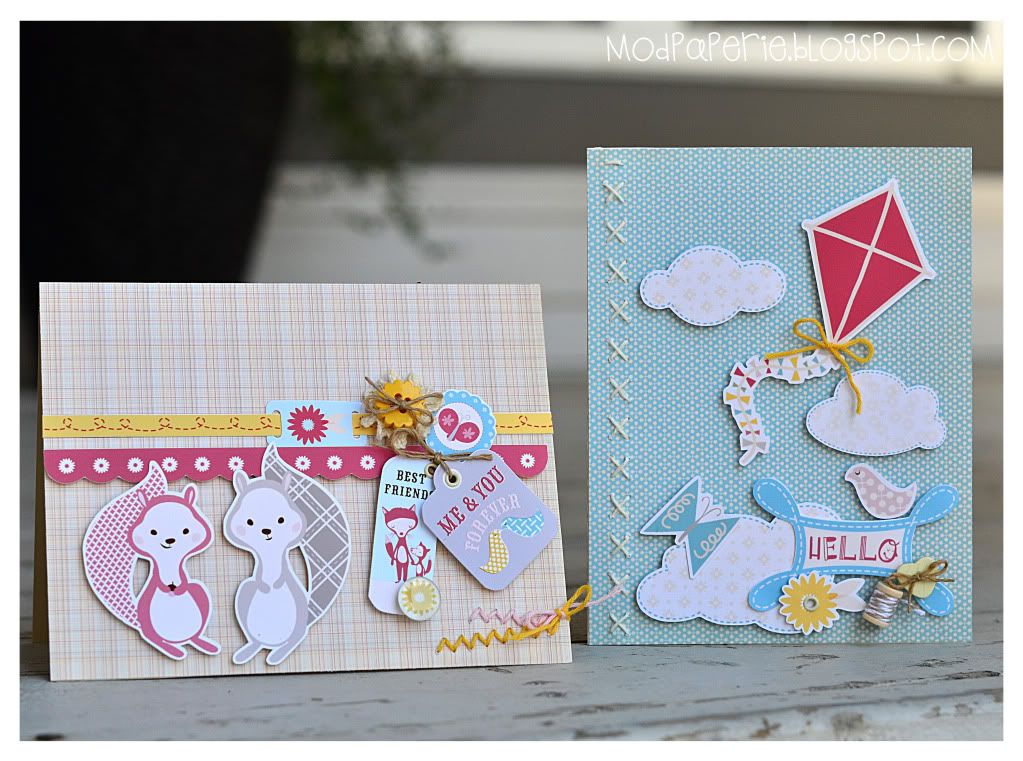
Photobucket

Aren't they cute??? I think that it's the graphics that are cute, so anything that I'd do with it would probably look really cute!

Okay, I'm gonna overload you again with lots of photos... (this is a VERY long blog post by the way)
Photobucket

Photobucket

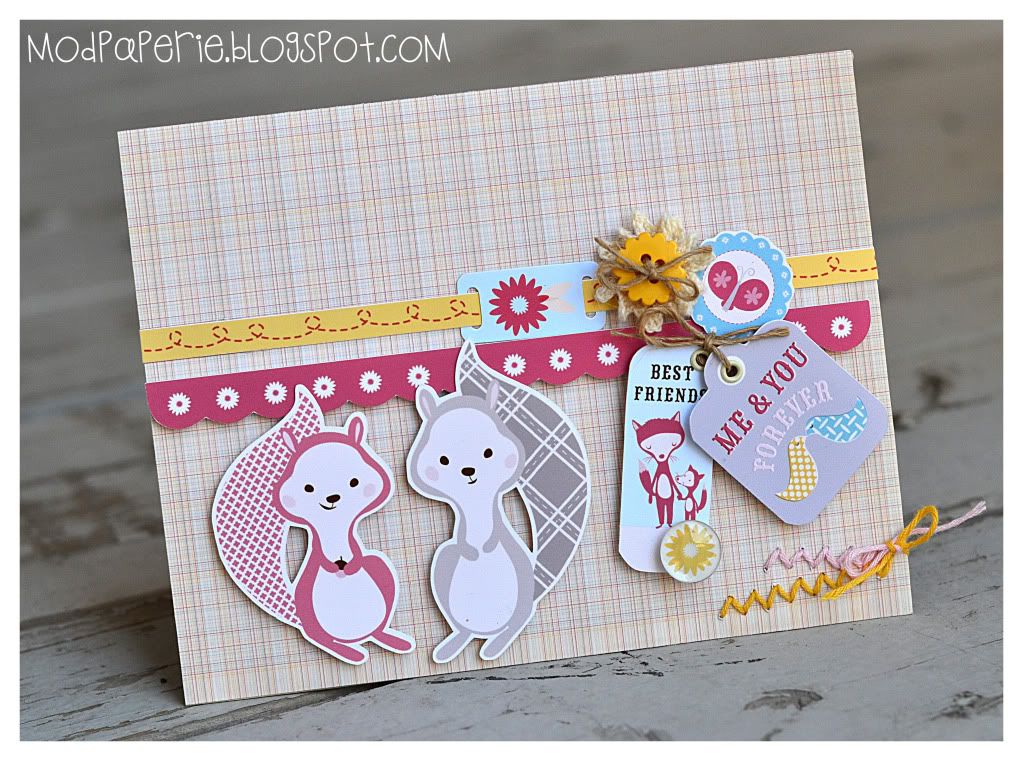
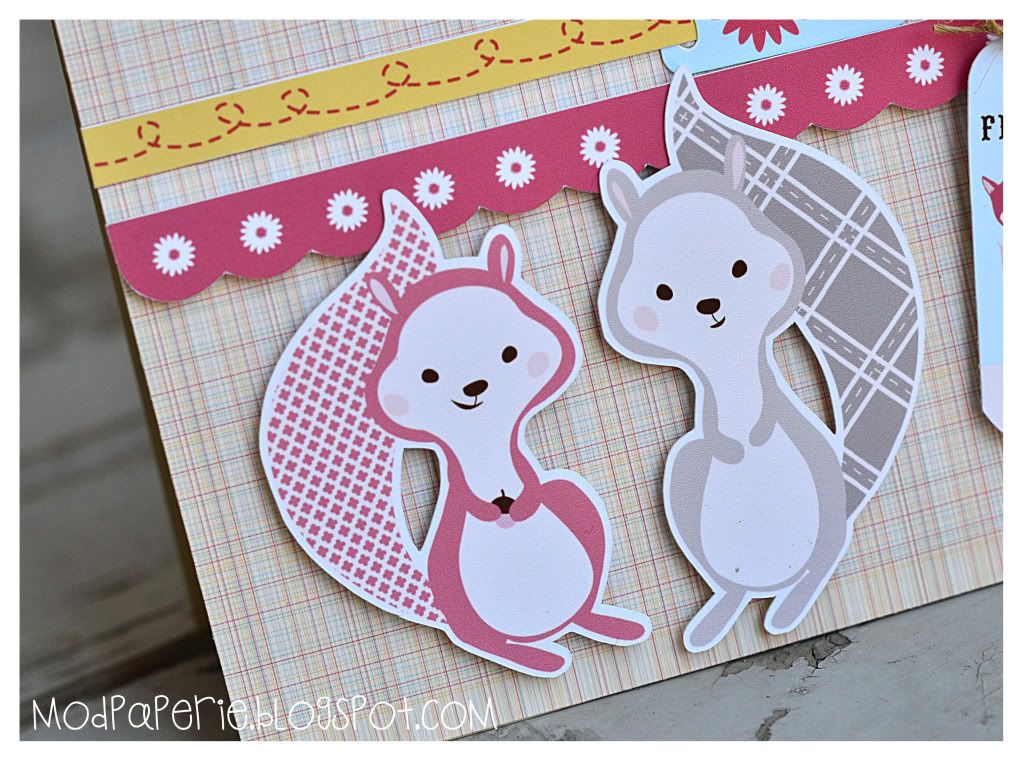
How adorable are these little buddies??
Photobucket

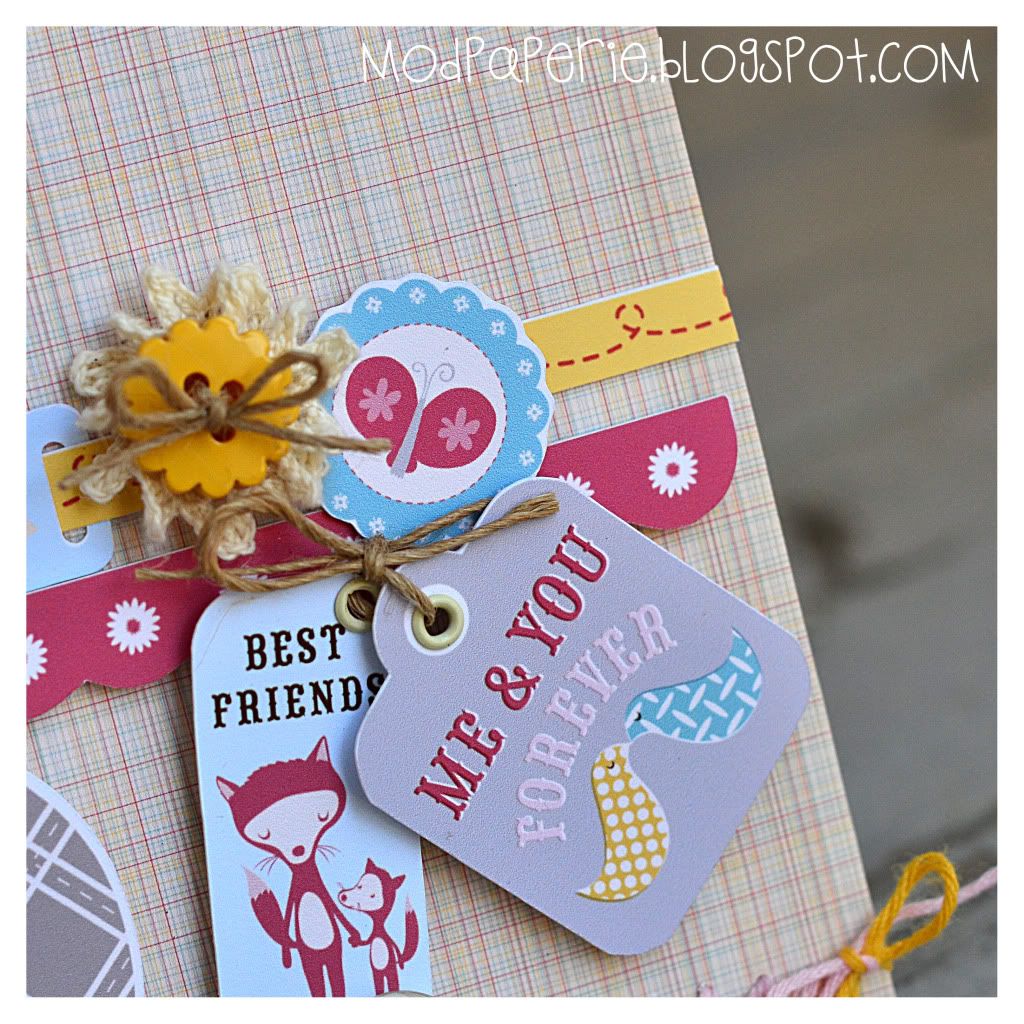
I put a matching colored twine on the bottom portion of a cotton lace, pulled and tied it together to make my own lace flower embellishment. I topped it with a yellow flower button.
Photobucket

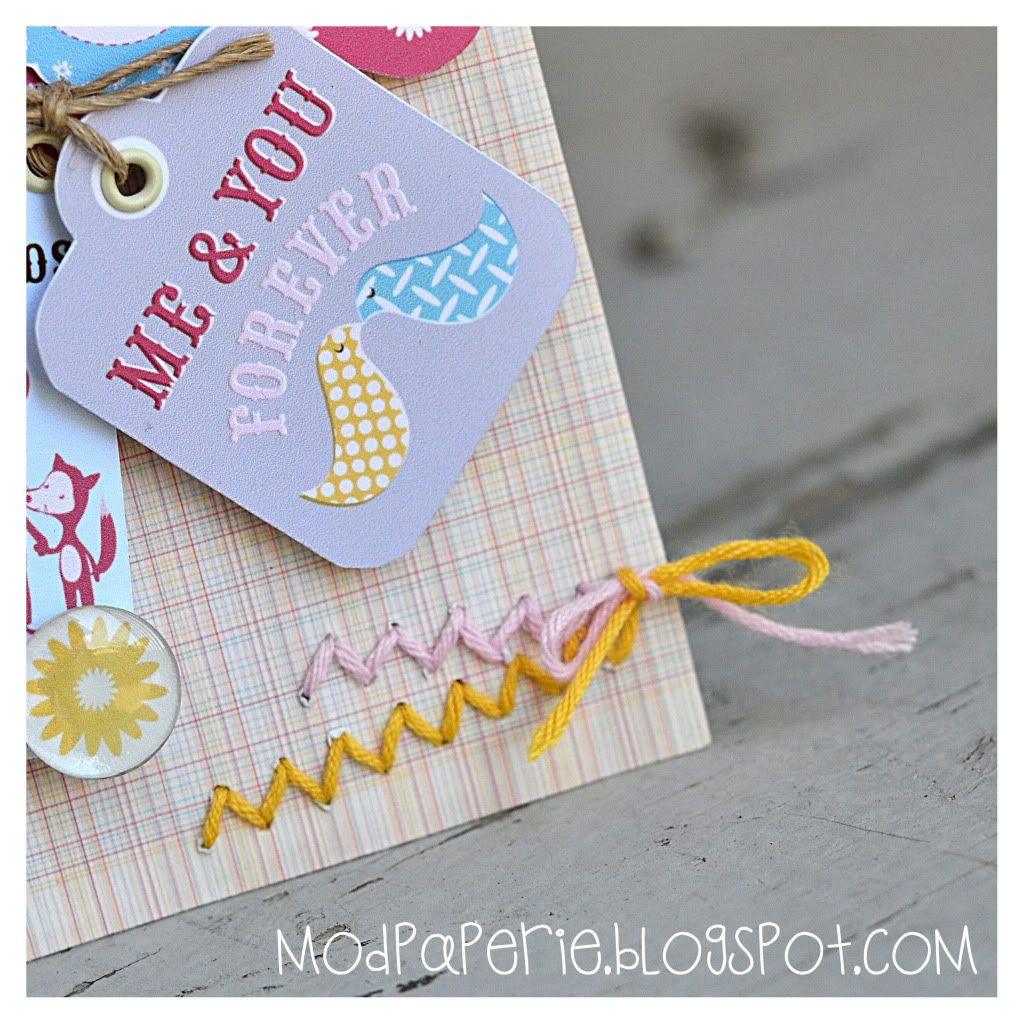
Do you see??? Yes, that is my Sew Easy! I used it for the second time! Oh, and I used my Epiphany Crafts  Shape Studio for the flower button. Love how it adds some gloss to my card.

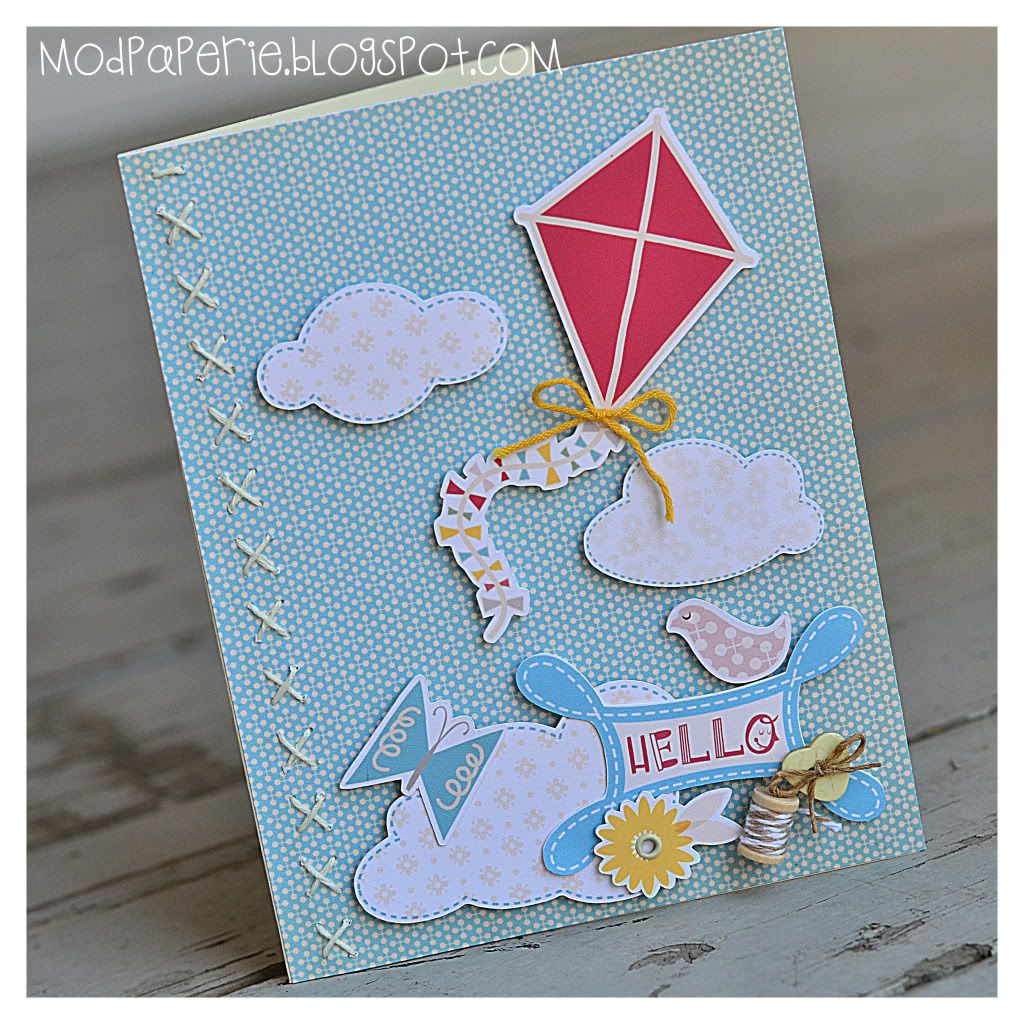
Here's the other card:
Photobucket

Photobucket

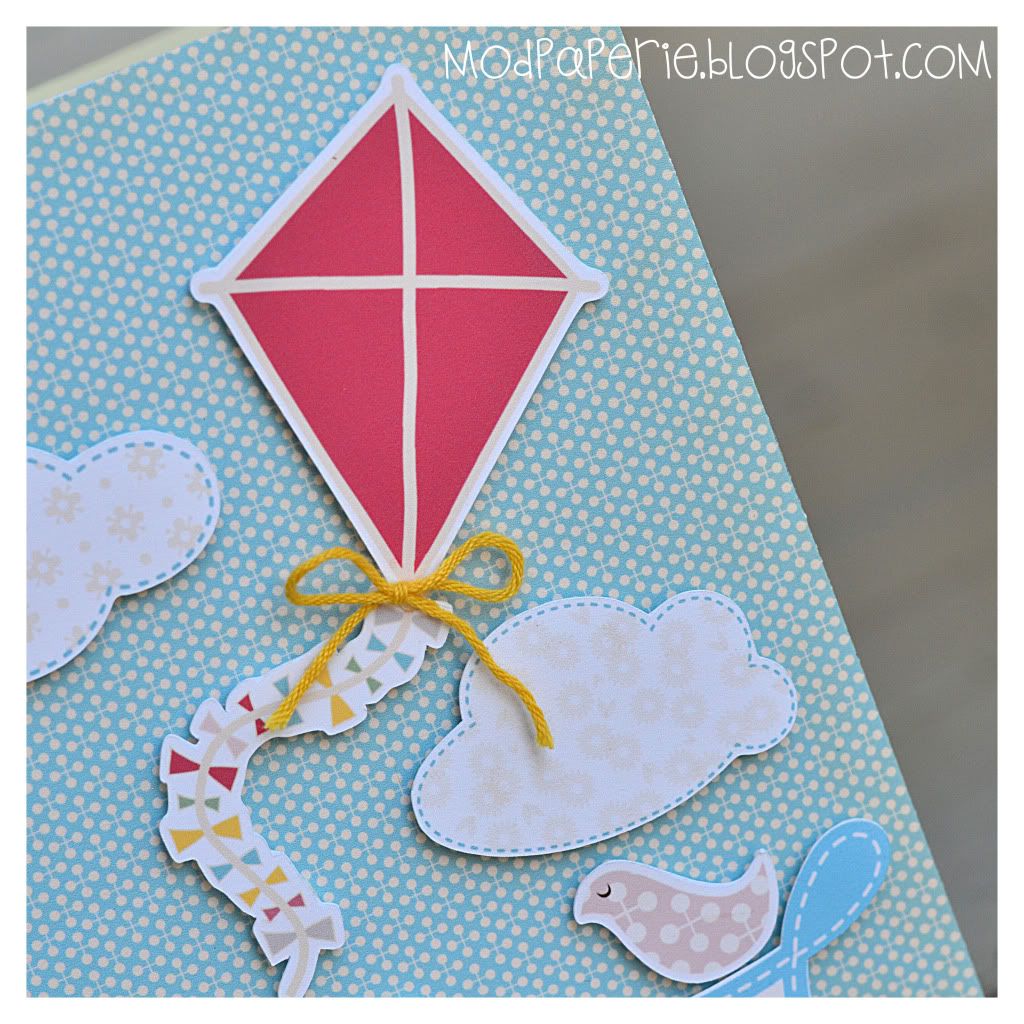
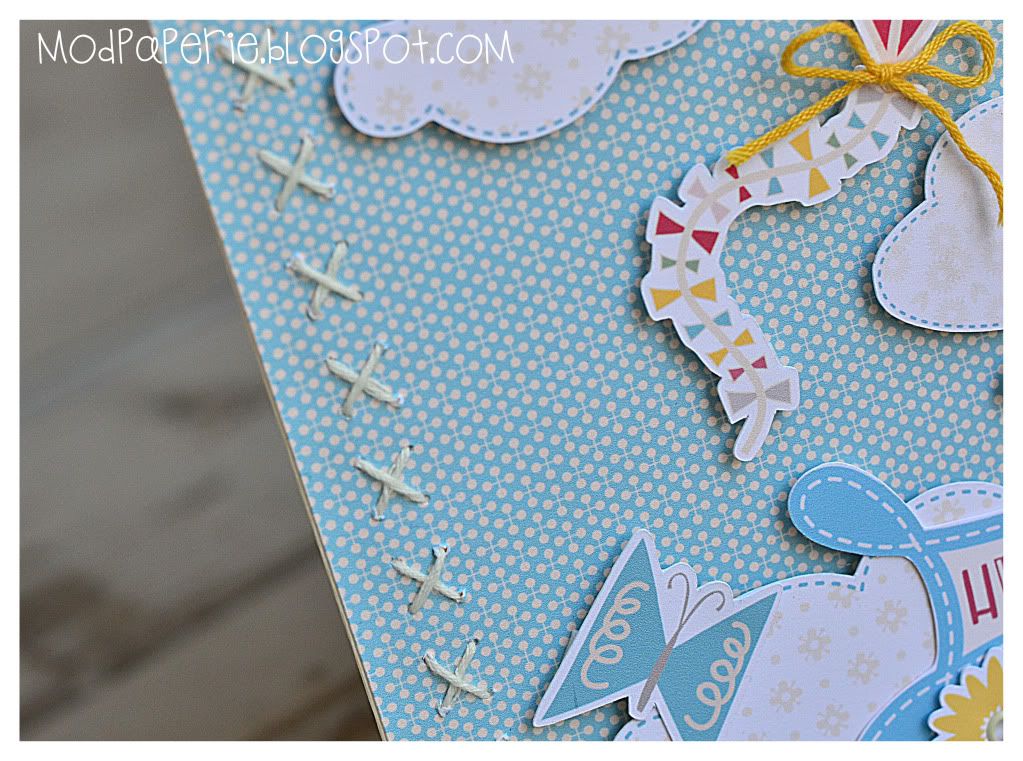
I always love cards with kites! Something about it makes me feel so free and cheerful.
Photobucket

Here`s my third attempt at my Sew Easy! Love how you can do so many different stitches with them!
Photobucket

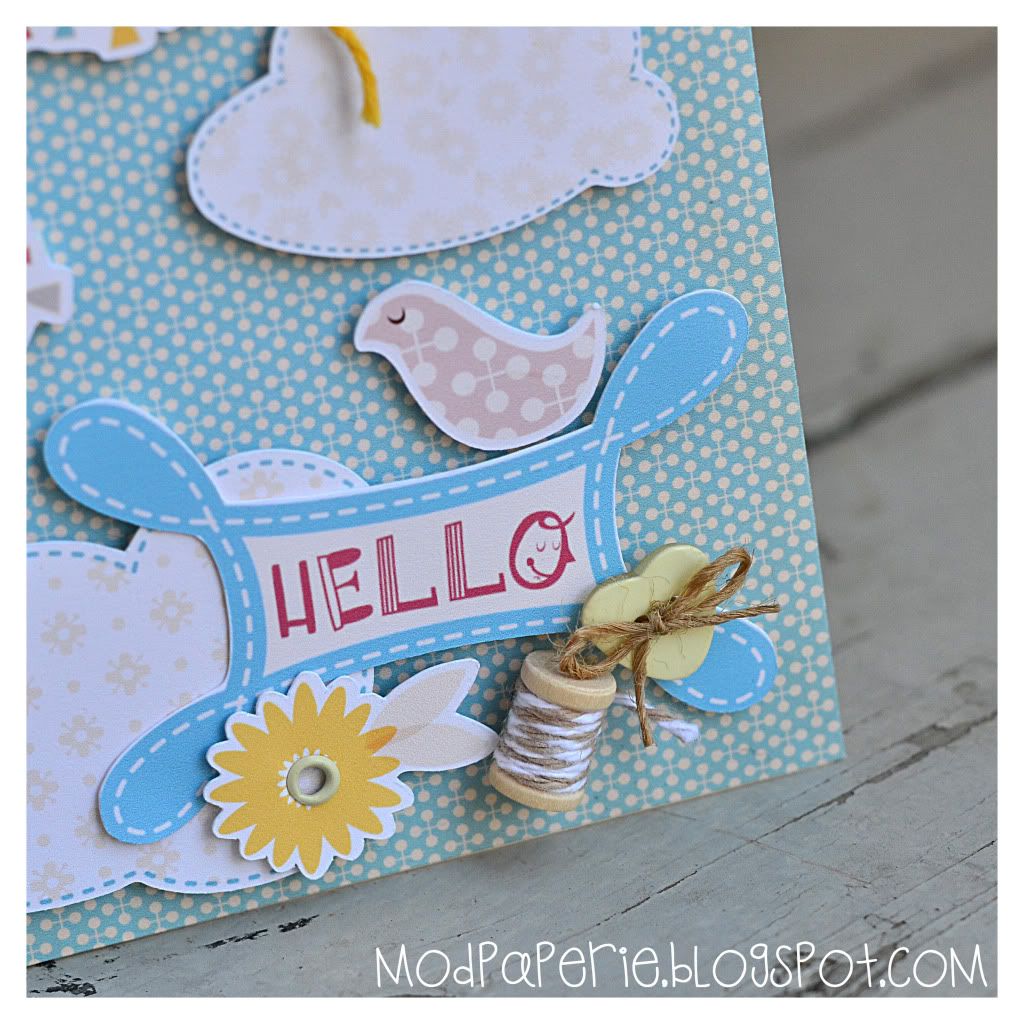
...and the wooden spool (got from Paper Issues) and the twine (Trendy Twine) matched perfectly with the colors of the card.

Hope that you liked them!
...

Okay, you thought that this blog post was over, didn`t you???? I was going to end it right here, but thought that I'd post other cards that I've been posting on the FB wall for those that don't do FB...

I'll make it really quick.

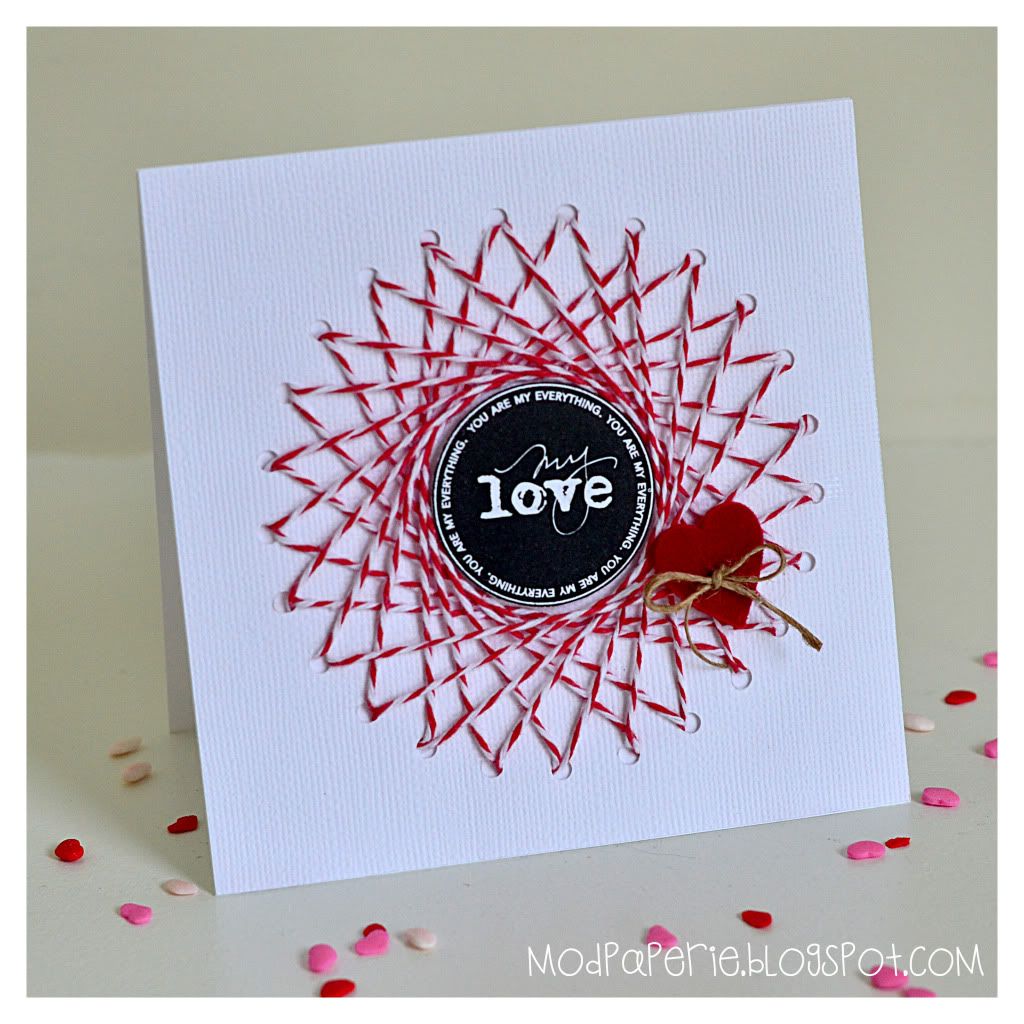
The last blog post was my Twisted Sugar Twine DT project... Do you remember that circle string art that I did with red twine? It was a little too simple for me, so added some embellishments to it. Much better, right?
Photobucket

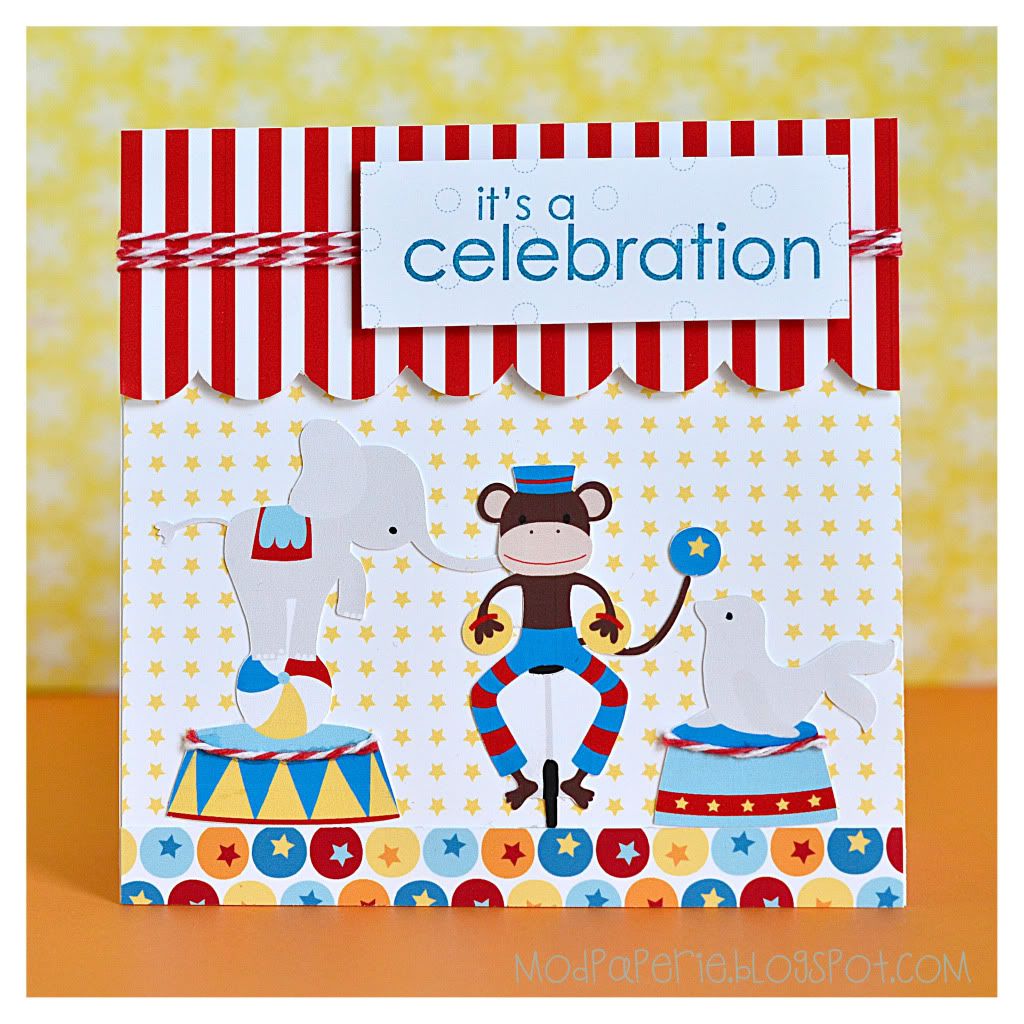
This next one is from Miss Tiina Circus graphics and papers:
Photobucket

Photobucket

The stamp is from Papertrey Ink, and the twine is from Twisted Sugar Twine.

Here's another dose Miss Tiina for you - it's pencil crayon graphics and Unity stamp for a simple back to school card.
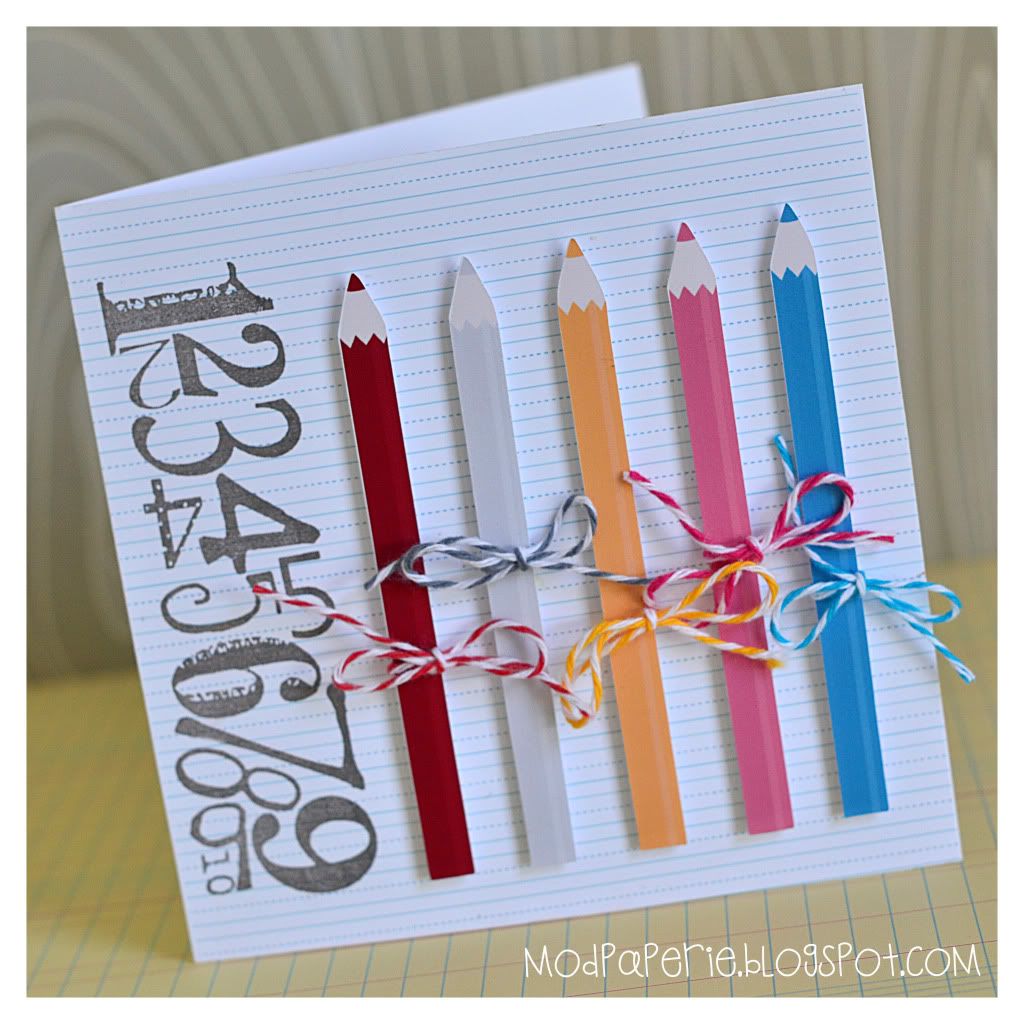
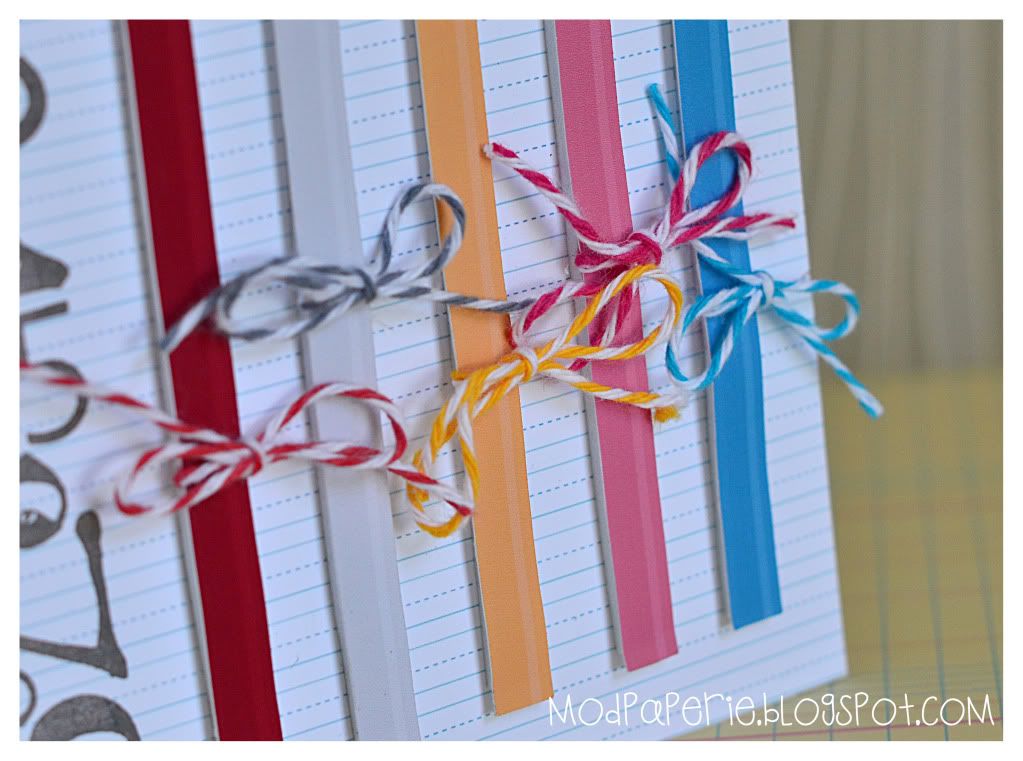
Photobucket

Photobucket

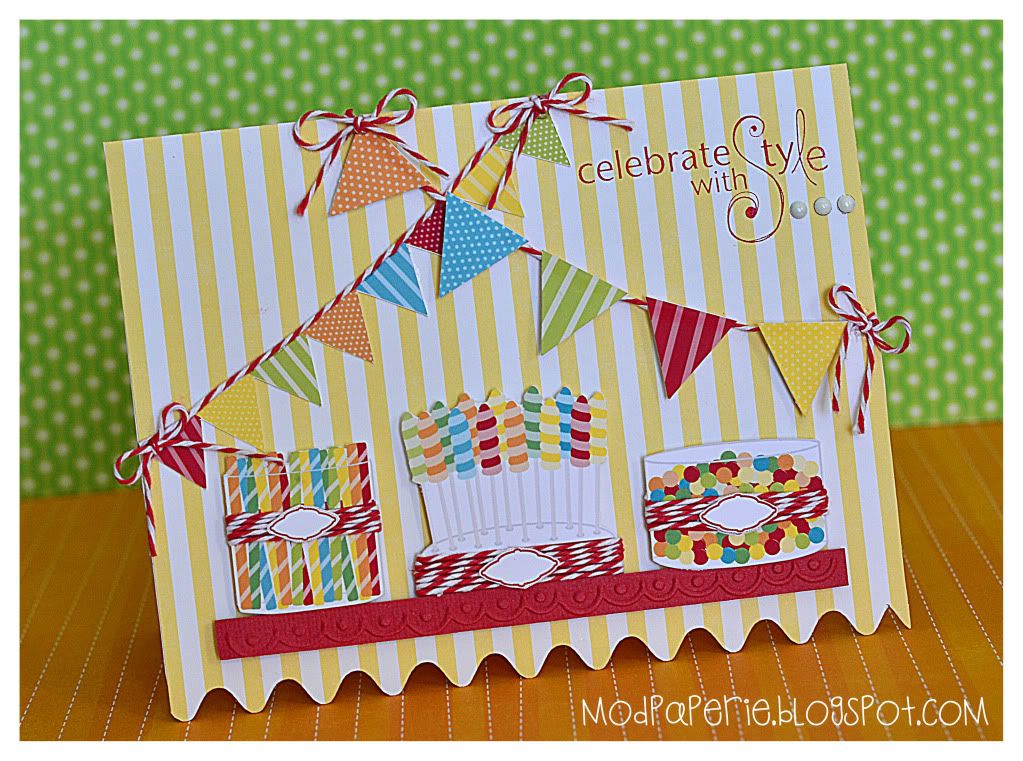
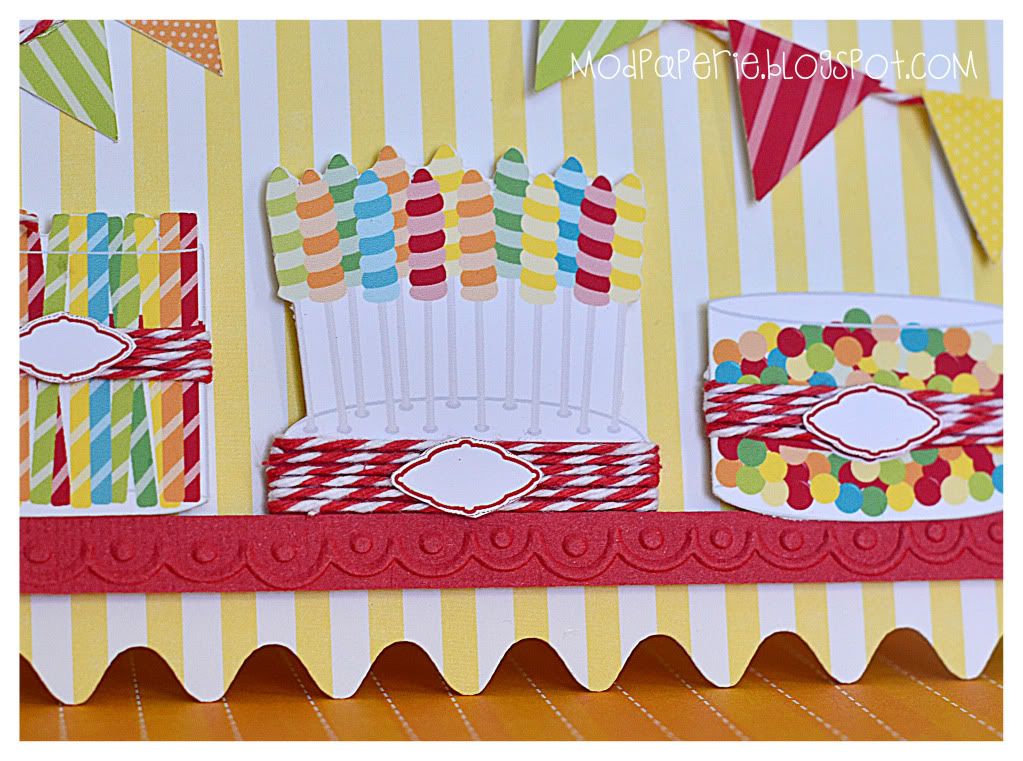
And... lastly but not least is the dessert party graphics from MyGrafico...
Photobucket

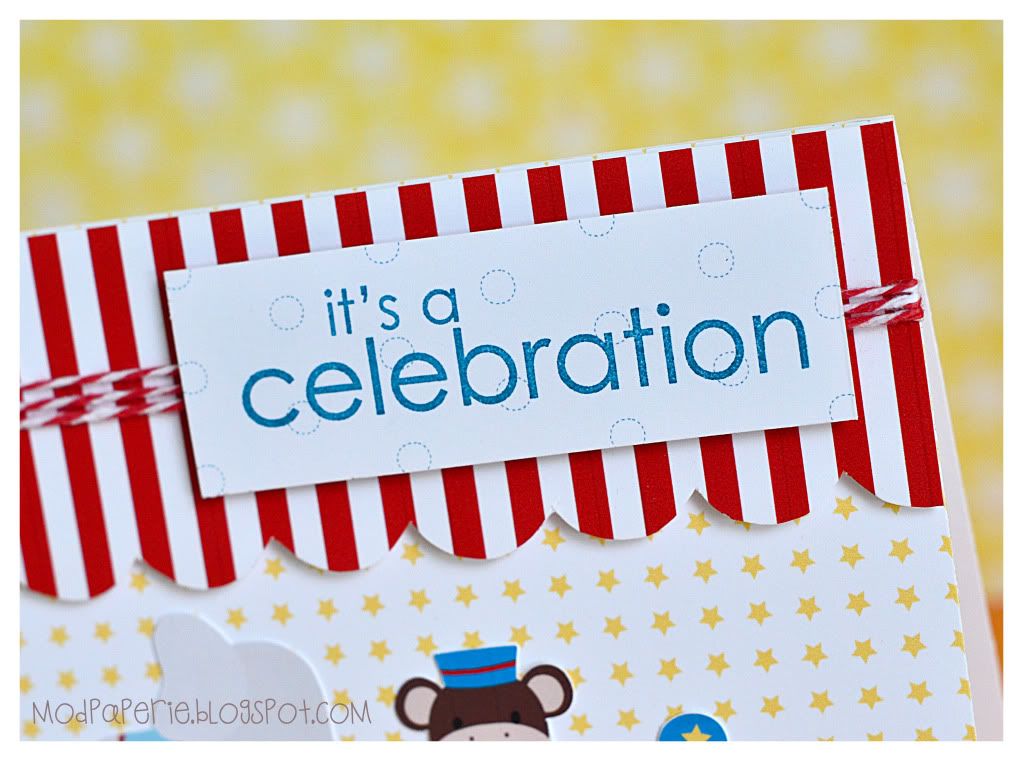
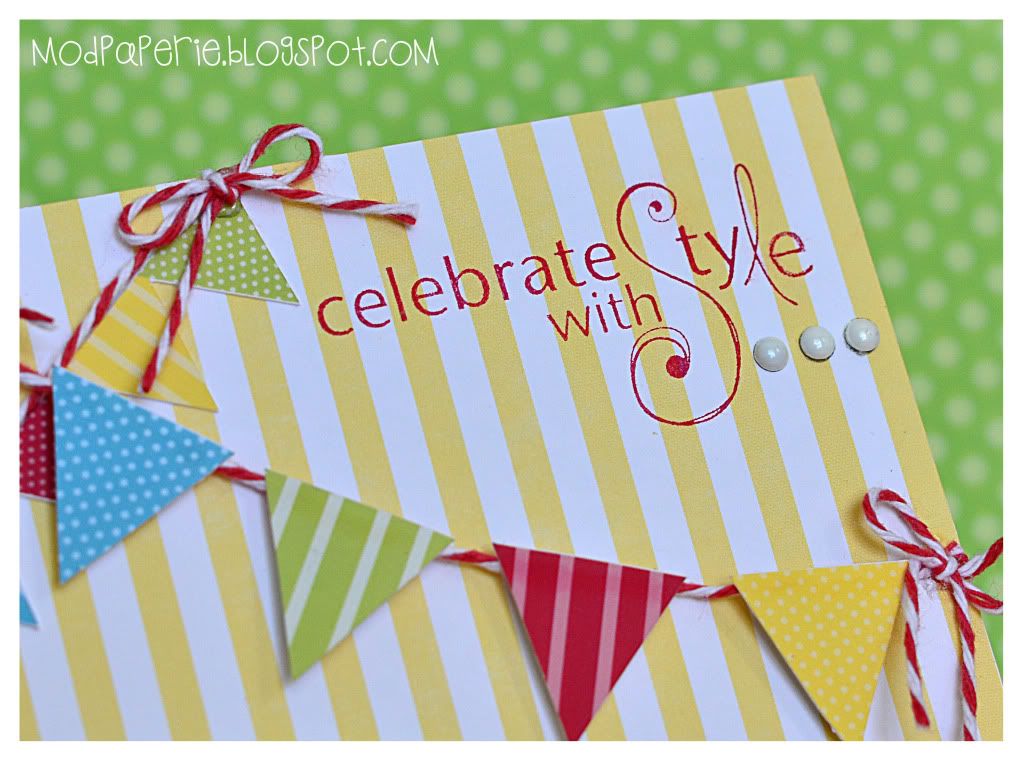
I love how festive this is! So fun! The twine is from Twisted Sugar Twine and the background paper is from Echo Park Springtime, and already came with this edging! The stamp is from Unity Stamp Co.
Photobucket

Photobucket

Okay, that's it girls!!!

Really, for good this time!

I'm off!
Have a great day everyone!


Thursday, August 25, 2011

String Art with Twine.

Hello!
It's another DT day for me over at Twisted Sugar Twine!

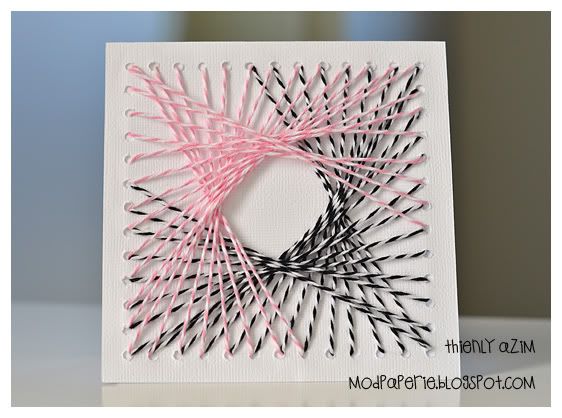
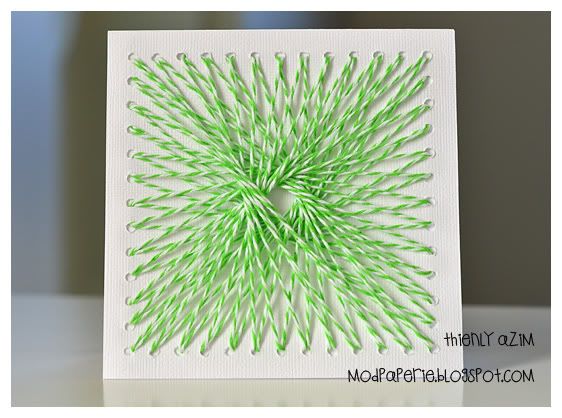
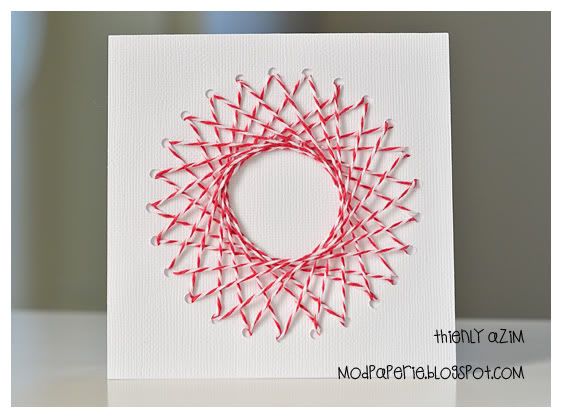
Today, I wanted to share with you a project that was inspired from a classic toy. I am sure that most of you have played with this one time or another - it's the spirograph! Do you remember sticking your pencil in one of the holes of the gear and you let this gear go round and round with your pencil within a bigger circle stencil, while drawing a curved, geometric path. I loved the look of it, and always made me feel so artistic, although I had nothing to do with it.

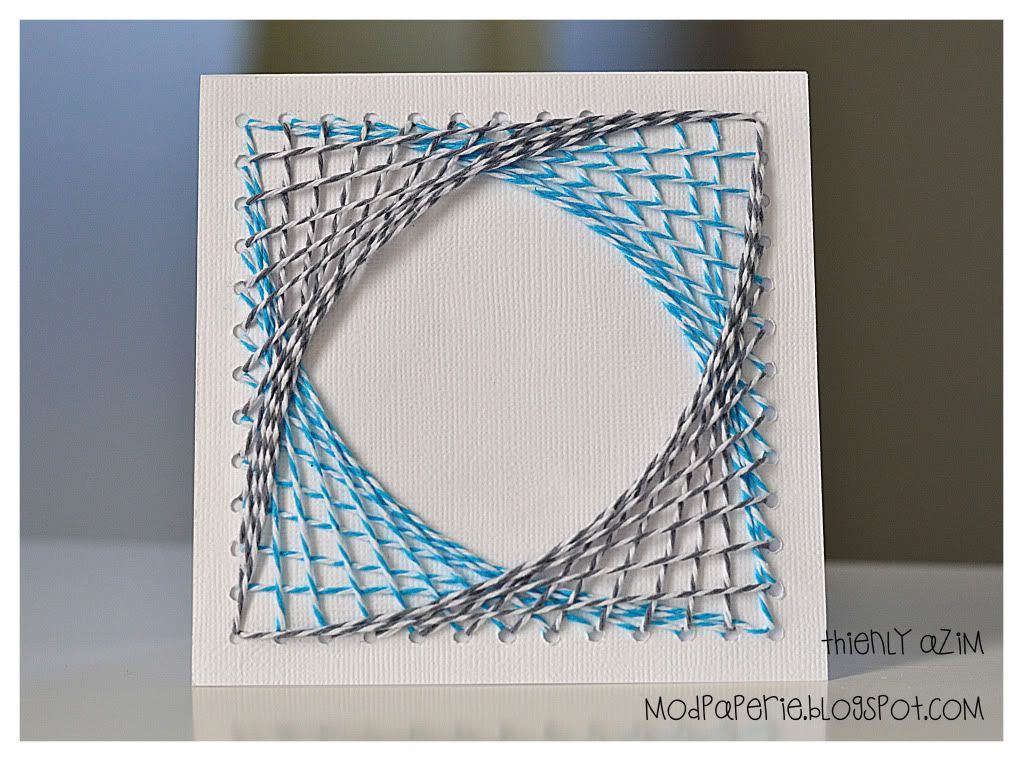
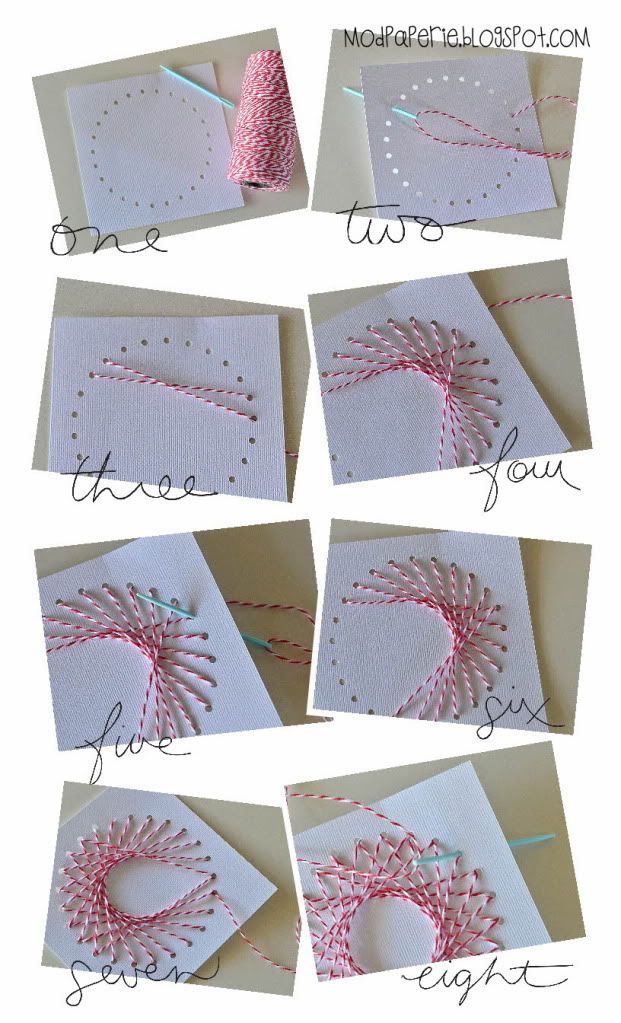
So, I thought that it would be neat to create this pattern using twine. Since there is no way that I can glue down every part of twine in a geometric curved shape, I decided to "sew" this pattern onto the paper.

The holes were created using my cutting machine (you can use rhinestone option - on SCAL and MTC - to create holes for you!), but you can always just use a punch or a piercer.

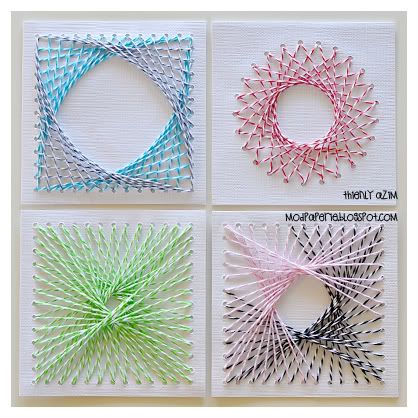
Here are the cards that I made! You could even make them into a wall art, too!

Photobucket

Photobucket

Photobucket

Photobucket

Photobucket
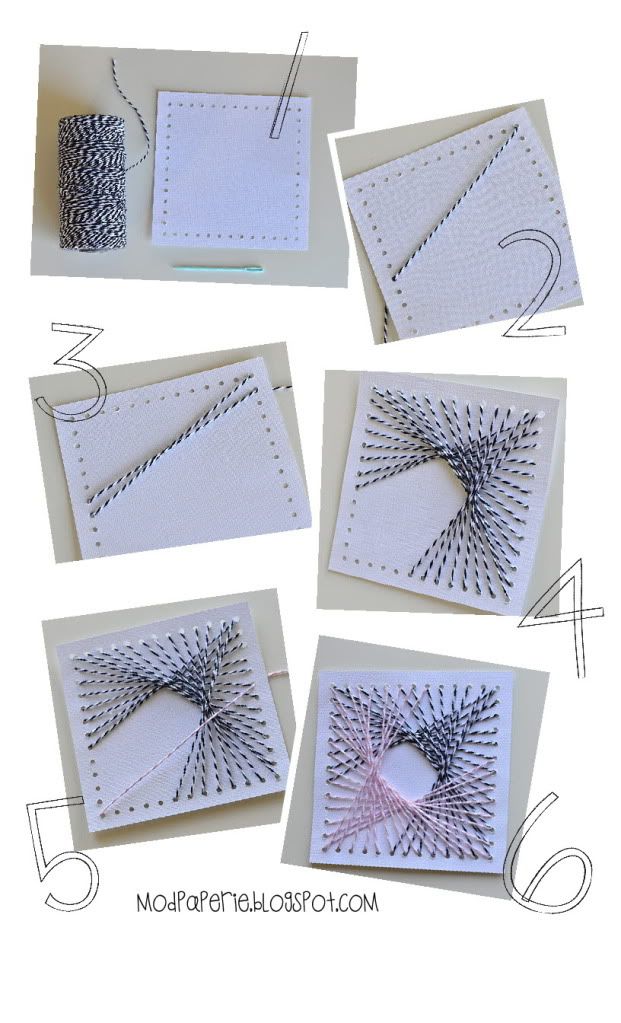
Here's the instructions:

Photobucket

You can pretty much pick a corner and one hole on the opposite side or the adjoining side and start "sewing" like above. Keep following this pattern until complete. It really doesn't matter what holes you choose, it'll work out in the end, and the holes that you choose will determine how big the pattern is, and what the pattern will be.

You can get creative and do this on the circle shown below:

Photobucket

Changing colors half way will create some interesting effects, or you can even add beads in the twine.
Experiment with different shapes, and different patterns. I've shown you the basics, now be creative!

Have fun!

Thursday, August 18, 2011

Diaper Shirts with an Attitude Cards with My Thoughts Exactly Stamps.

It's another DT project day for me over at My Thoughts Exactly, and today, I thought that it would be really fun to create something using all four stamp sets released so far.  In case you haven't seen their stamps, you can see it here!  As you can see, their stamps are mix and match, so you can create endless possibilities of different sayings.  If you get really creative, you can even mix and match from different sets!

This is a really really simple project, as I've been busy with back-to-school stuff and spending as much time with the kids before the fun, summer days are up!  We also got back to cleaning up the basement (I don't know if you all remember, but we had our house reno'd last summer, and there were still things that we haven't cleaned up yet!  We're not lazy - it just wasn't our priority! lol...) 

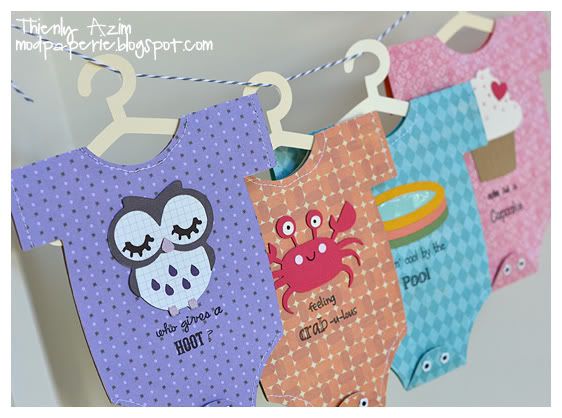
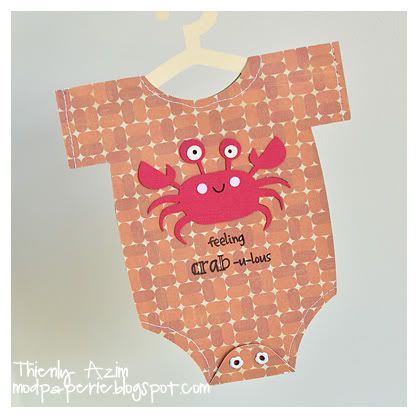
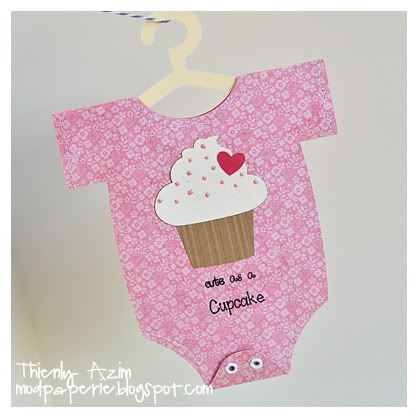
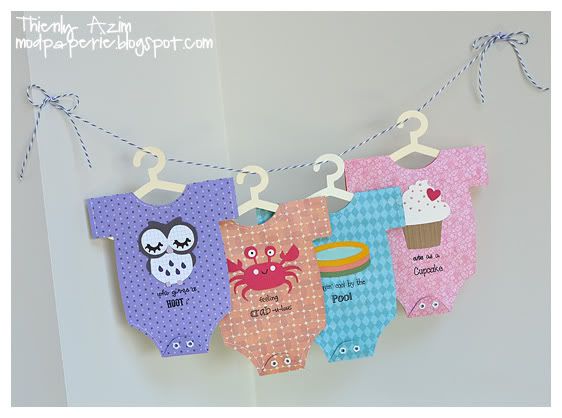
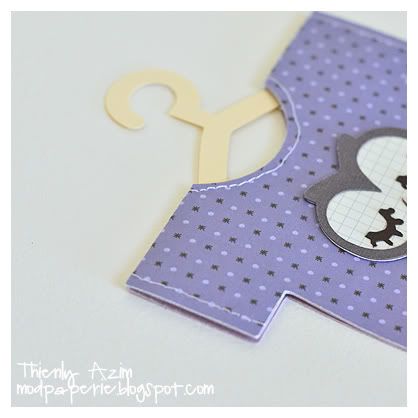
I decided to take some fun sayings from the stamps, and make some diaper shirt cards with it.  The diaper shirts are from Peek-a-Boo LD SVG set, and I used my sewing machine (if you notice, I'm really lazy with sewing machines...  now, you see white stitching, and you probably have seen white stitching for my last few projects and will still see white stitching until my bobbin is done with white thread.  I started with my brown thread last summer, and used that up, before I changed into white!) to sew up all the hems...  This was very hard, as I'm not a seamstress, and sewing them in curves was itself a challenge to me.

Anyway, here's the project! Ta-da!!!!

Photobucket

Pretty simple, huh? It's really easy, but I think that it's cute!

Here are some close ups!

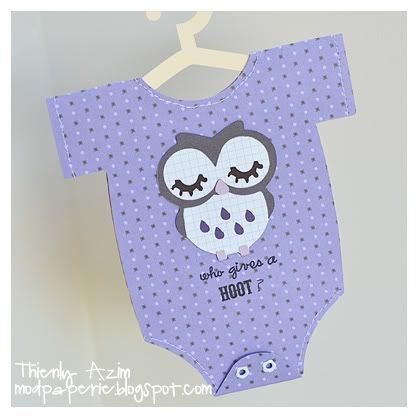
Who gives a HOOT?

Photobucket

The stamps are from the Birds and Bees stamp set. This owl is from Give a Hoot collection over at SVG Attic. I think that it's a perfectly innocent owl for this shirt!

Photobucket

See? I sewed it!

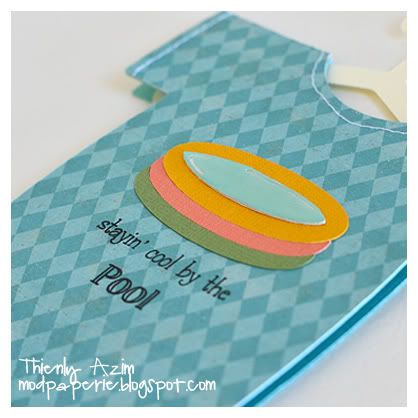
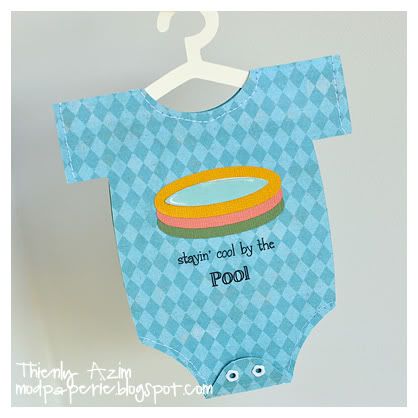
Stayin' cool by the POOL:

Photobucket

This diaper shirt is using the Grillin' n Chillin' stamp set. The kiddie pool (which I fell in love when I saw it - and this SVG was hard to find! and found it over at the Silhouette store under Kiddie Pool.)

Photobucket

If you notice, I put on Glossy Accents on the water to make it look more like water. Love using these - adds so much!

Feeling CRAB-ulous!

Photobucket

The stamps here are from Under the Sea stamp set and the crab is from LD ...  Now, is being CRAB-ulous supposed to be a feeling fabulous or crabby?  I thought that was for fabulous, but my hubby says that you're not in a good mood, when it's CRAB-ulous...  and he thinks that the crab looks too cheerful! lol... it's just a craft project!

Cute as a CUPCAKE:

Photobucket

Here, the stamps are from Sweet Thoughts stamp set and the cupcake is from LD Cloud Nine SVG Set.

I hung those diaper shirts on a hanger - which I found in the Chores LD Cut It Simple Shapes, and attached eyelets at the bottom to look like snaps. I added tiny foam adhesive to hold the shirt closed, and you can easily open and close it.
Here's the last look together, in case you feel like you haven't seen enough pics from me!

Photobucket

So, head on over to Lenae's blog and Jessica's blog - 'cause I know they also have some cool projects to show you with these stamps!

Have a great day everyone!


Tuesday, August 16, 2011

Using new Cut It Tiles from Lettering Delights to do Print and Cut.

Have you all seen the new Cut It Tiles from Lettering Delights that was just released this week?  (last Friday)  Well, I admit, when I first saw this, my first reaction was "wow" and "Oh my! This looks really confusing!".  However, it's not.  I watched the video and tried it myself and it was super easy!  It's so fun to be able to change the pattern/color of your file on Make the Cut!

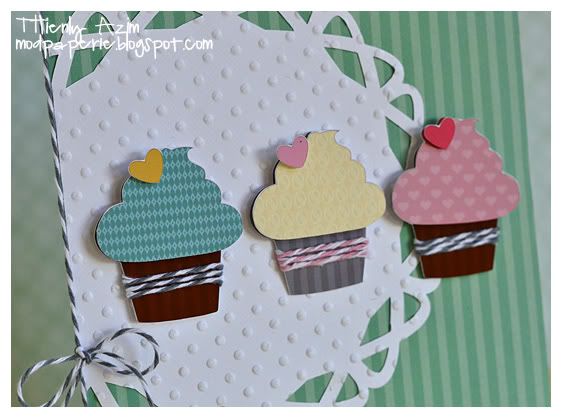
So, this is nothing spectacular, but here's what I made!

Photobucket

Photobucket

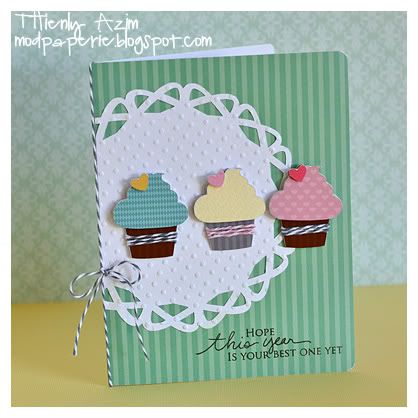
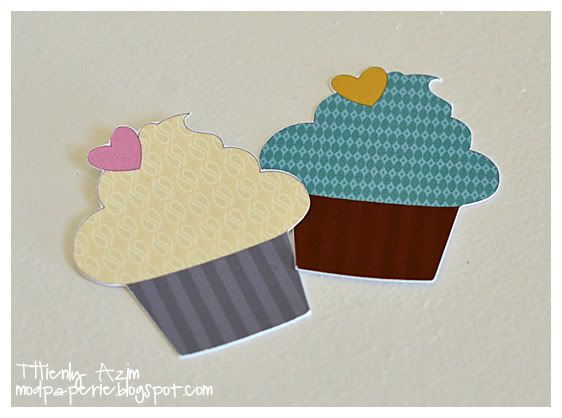
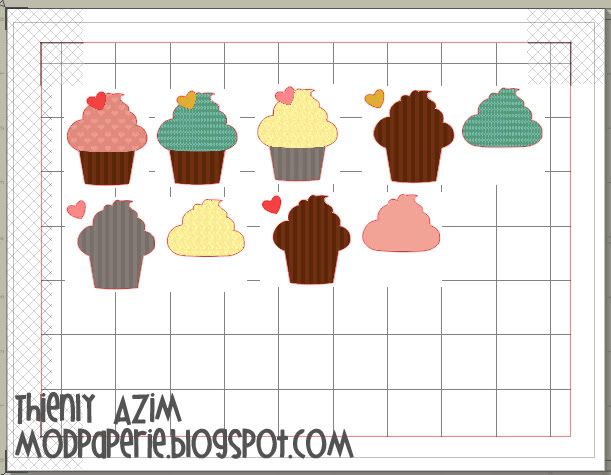
The cupcake is from LD Cloud Nine SVG, and I changed the cupcake icing and the wrappers to make three different ones

All the tiles I used here are from Matryoshka Cut It Tiles.  Here, I made each of the portions separate (like how I would cut in a regular SVG - I personally like it separate as you can work around with dimension) but you could also put them together and save one one file to create a graphic.

I thought that I would show you step by step of how I did this, and hope that this would clarify somethings for you!

So, open up an SVG file that you would like to work with.  Break apart the file.

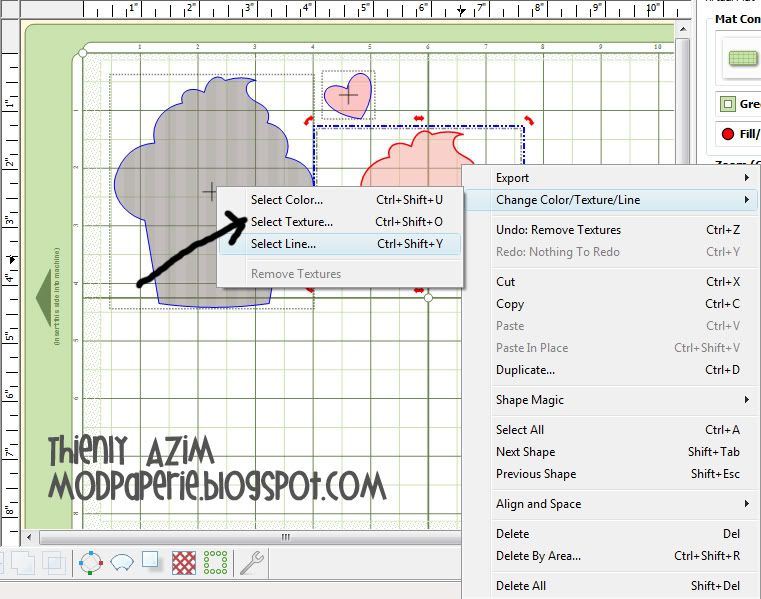
You select one and right-click.  It would bring up a menu, and click on "change texture".

Photobucket

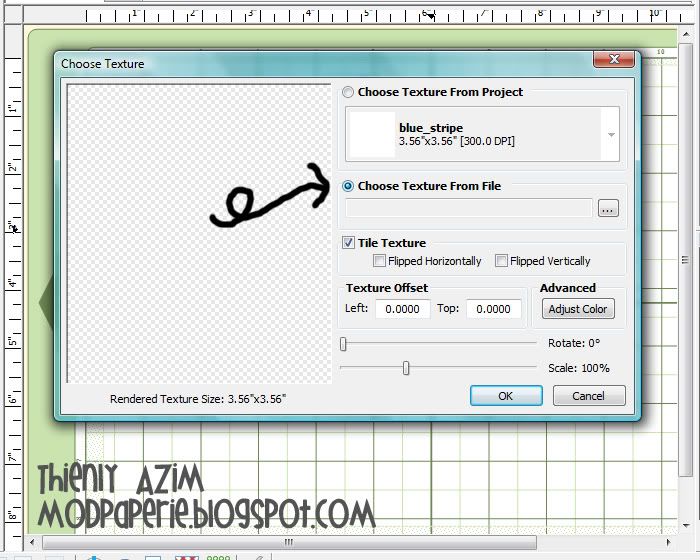
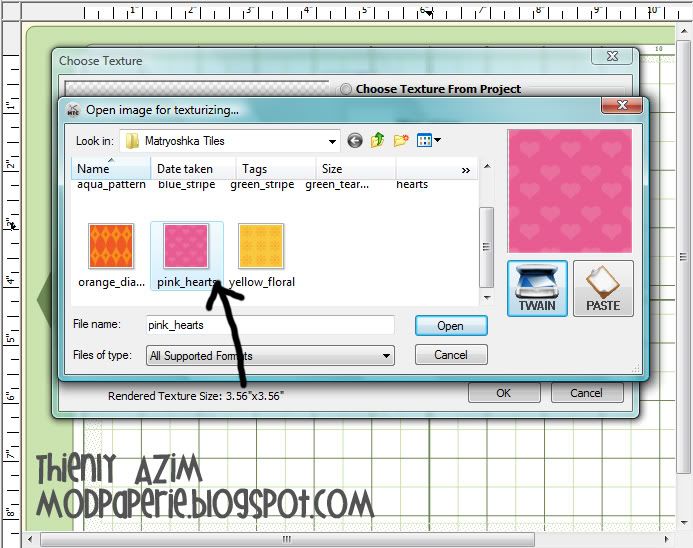
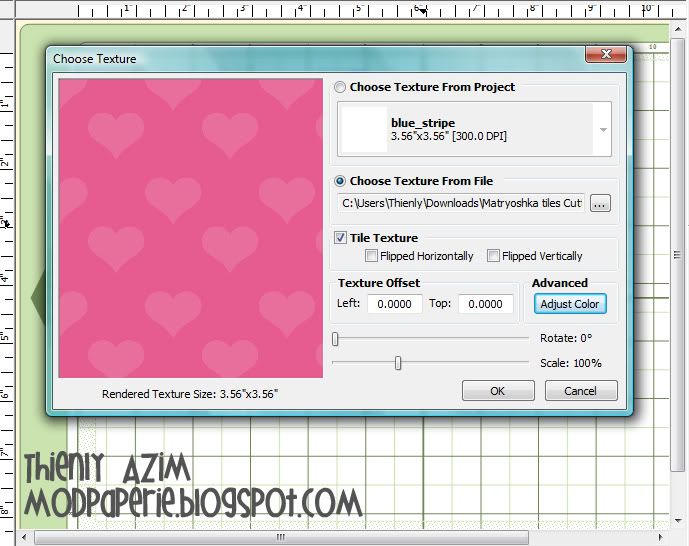
Then, you click on "choose texture from file" and find a tile that you would like to work with.

Photobucket

Photobucket

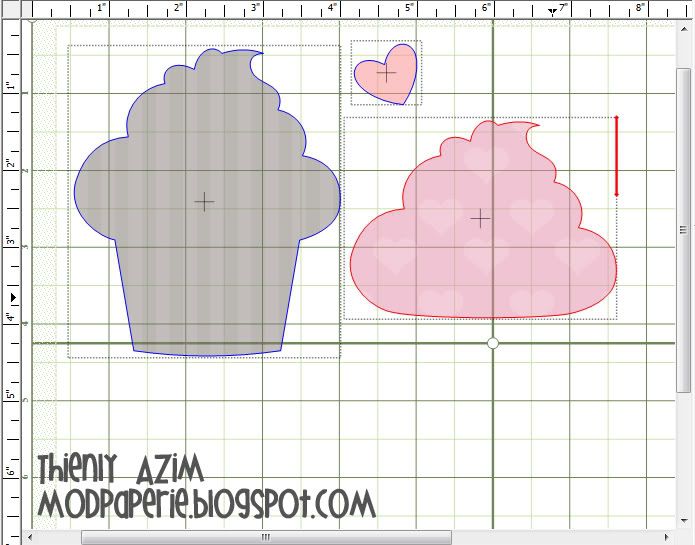
Now, you have the option to play with this tile. You can change the size of the pattern, spacing, rotate, adjust color... you play around with it! It's so fun - it's amazing what all you can do!

Photobucket

Once you like what you've got, click "ok"

Photobucket

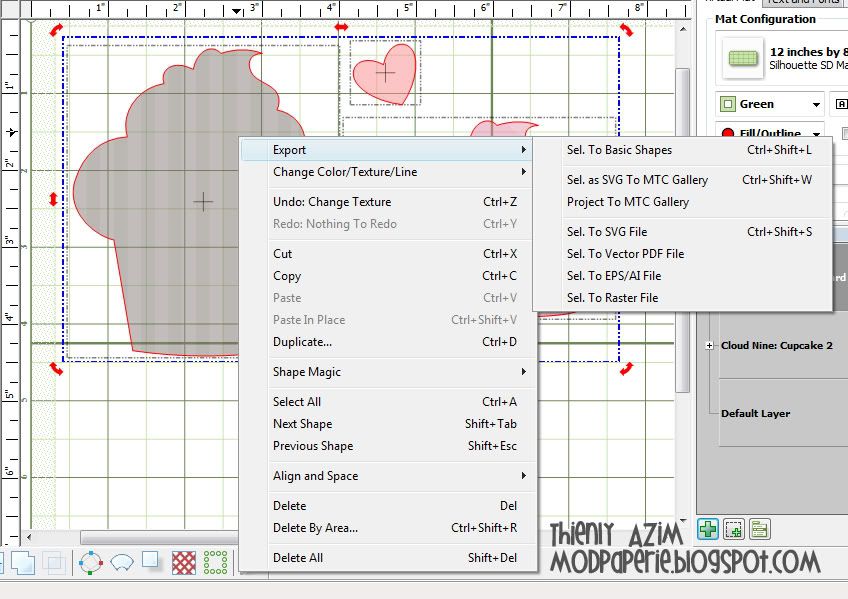
Now, it`s time to save the file so you can print and cut with it!

Click on Export and save the image the way you want it.

Photobucket

Here, I saved the portions separately, but you could bring the layers together and save as one file, too!

Photobucket
Photobucket


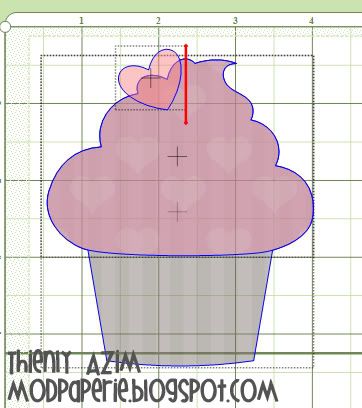
I brought up what I made on Silhouette Studio (I`m just used to doing Print and Cut here, but you can do on MTC as well!) and saved 3 cupcakes in layer formats, and as one image.

Photobucket

Lettering Delights is having a little contest over on Facebook for a random draw for $15 LD gift certificate. One winner will be chosen from all that posts their projects on their wall - so I`m posting this one :) Hope that you all give it a try! It`s really fun!

Have a great day everyone!

Thursday, August 11, 2011

My first Twisted Sugar Twine DC project - usine twine in a book-binding.

Hello everyone!
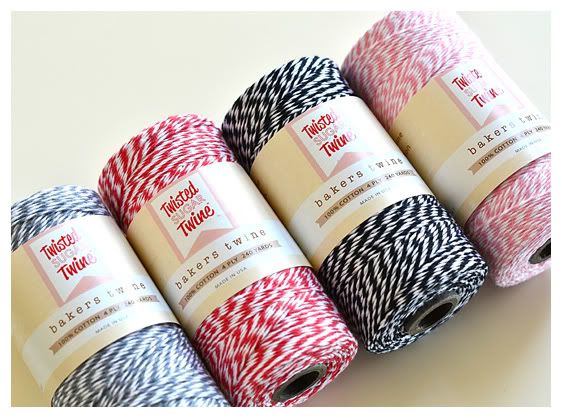
In case you never saw my previous post, I have been asked to join over at the Twisted Sugar Twine as one of their Design Coordinators, which I'll write DC for short.   (It's pretty much the same as DT, but sounds more sophisticated!) I've always loved the look of twine, and you've probably noticed that I've been using a lot of twine recently in my projects.

My first post is published over at the Twisted Sugar Twine blog, too, today!  If you could leave me some love there, I would really appreciated it!

I got my twine pack just 2 days ago and I needed to create something in one day to have my post ready for today!  That's usually my story with me living in Canada...  takes about 3 times as long for me to get anyting here compared to most of you living in US.. so I'm used to it :)

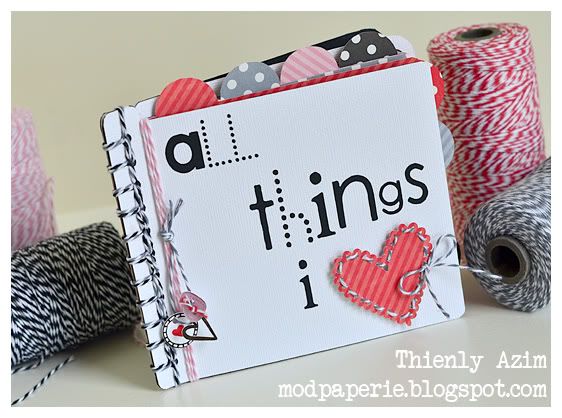
So, I decided to keep it simple and create a little book using twine in a book-binding.  I've also used twine in 3 other areas of the project, so make a note of that as well :) 

Here it is!

Photobucket

Simple, but pretty, don't you think?

I found this cut file (album with half round tabs) through the Silhouette online store, and thought that this would be such a fun way to create a book, rather than just using regular rectangle pages. The size of the album is 5.575" wide for the cover page.

Since there were only 3 holes on the side in the original file, I had to add more holes throughout (you can use the spacing and aligning functions on the Silhouette to make sure the holes are evenly spaced out!)

I didn't have time to work on the inside pages, but I've always wanted to make a little book and paste in all my pics of all the people, places, food - anything that I love.

When I thought about "love" - I was able to narrow down the colors of the twines that I wanted to use. (although I never used red - it still was an inspiration color to me)

Photobucket

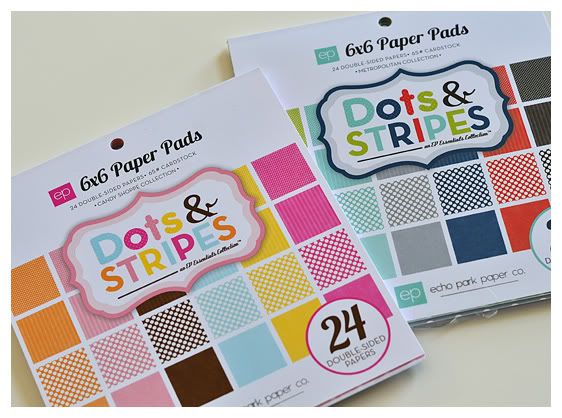
I then decided that I would color coordinate my book with my twine and decided on 4 colors: pink, grey, red and black from Echo Park Dots and Stripes Paper collection.

Photobucket


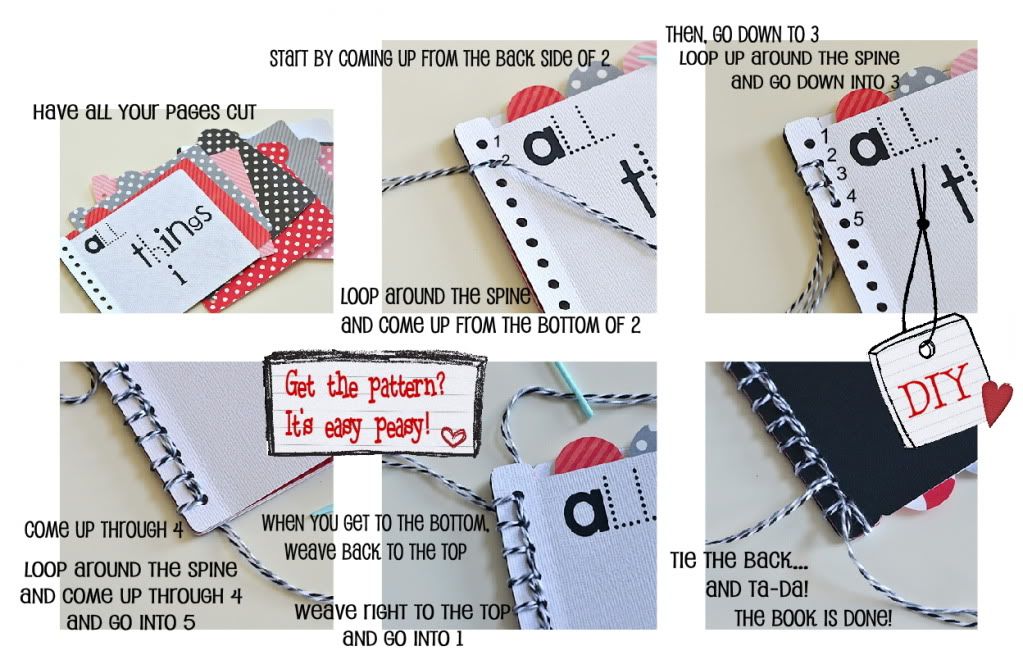
...and here are the instructions on how to bind your book with spine. Sounds confusing, but when you actually have the book and the twine in your hands, it all does make sense.  Trust me :) It's really small, but when you click on the picture, you should be able to see the writing.

I used double twine - black and grey - in the binding.

Photobucket

I also used twine in several other places in this project:

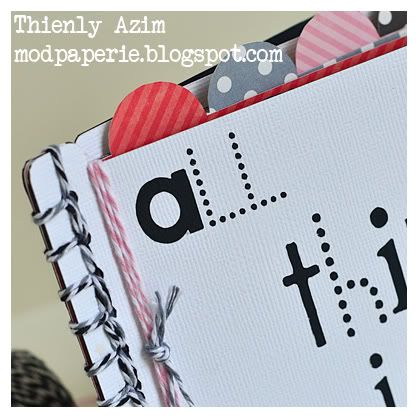
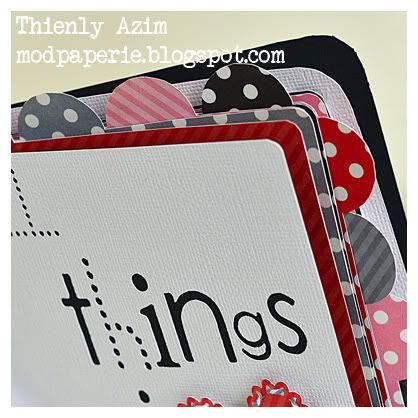
For embellishing the side of the front cover - I just looped pink twine around it 3 times and tied it together.  Do you like the font I used here?  It's called Pass the Chex font.

Photobucket

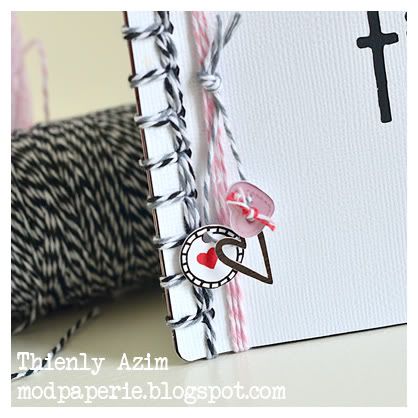
I also used grey twine to string through some little charms (the charms are from Sweet Love kit by Miss Tiina - I want to link it but it's in her confectionery club, and can't link it) I cut out on a Silhouette and tied it to the above pink twine.

Photobucket

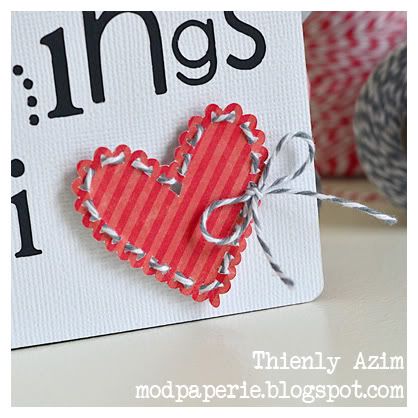
The heart which I found in the Silhouette library (comes when you purchase the machine) is weaved through with grey twine. The size of this was 1.85" wide.

Photobucket

... and here is a pic of the pages from the side.

Photobucket

So here was my first twine project! It was sooo hard to keep it simple and having to keep the twine as the focus of the project. I'm so used to embellishing with all sorts of SVGs, but then it takes away from the the twine. Hope that this project showed you how powerful twine is as an embellishment!

LinkWithin

Related Posts with Thumbnails